参考
参考了这篇文章:Hexo Next主题添加版权信息
步骤
首先打开next的_config.yaml,设置enable为true
1 | # Declare license on posts |
然后到hexo的主_config.yaml,搜索url:,把内容改成自己的博客域名比如:
1 | url: https://exkulo.github.io |
然后就发现能显示出来了。
魔改协议出现的位置
为了更让协议更醒目,我们可以把协议的位置往上调到文章出现以前。
打开themes\next\layout\_macro\post.swig,找到这么几行代码。
1 | {% if theme.post_copyright.enable and not is_index %} |
把这几行代码剪切,放到这个位置
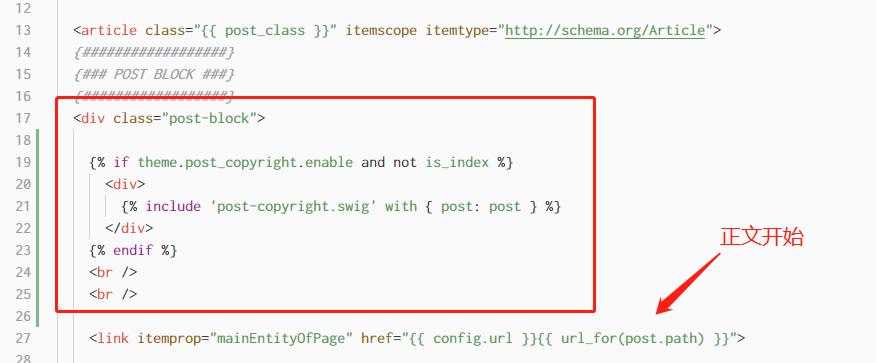
下面的两行<br />是为了把正文的位置下移,显得不会那么挤。